Softening Light on Short Walks: Reflectors, Diffusers, and Shade Compared
Problem
On short walks and quick outings you often encounter light that is too harsh for the subject you want to photograph: bright highlights, deep shadows, hot patches of sun on a face or texture that lose detail. Carrying a full kit—stands, heavy modifiers, or continuous lights—usually isn’t practical. The question is: what small tools or simple methods will most reliably soften or reshape light while staying light, portable, and fast to use?
Principles
Three basic ideas govern how these small interventions change the look of light.
- Apparent source size. The larger the effective light source relative to the subject, the softer the shadows and the gentler the transitions. A small flash or the sun is hard; a large reflector or translucent panel creates a soft effect.
- Distance and angle. Moving a modifier closer increases its apparent size and softens light. Angle determines which parts of the scene receive fill or diffusion.
- Color and texture. Materials add color casts and specular highlights. White fabrics give neutral fill, silver adds contrast and punch, and translucent plastics tend to warm or cool slightly depending on material.
Examples
Below are three compact approaches you can use on brief outings. Each entry compares materials, method, and trade-offs, then suggests typical scenarios where it works well.
Collapsible Reflector
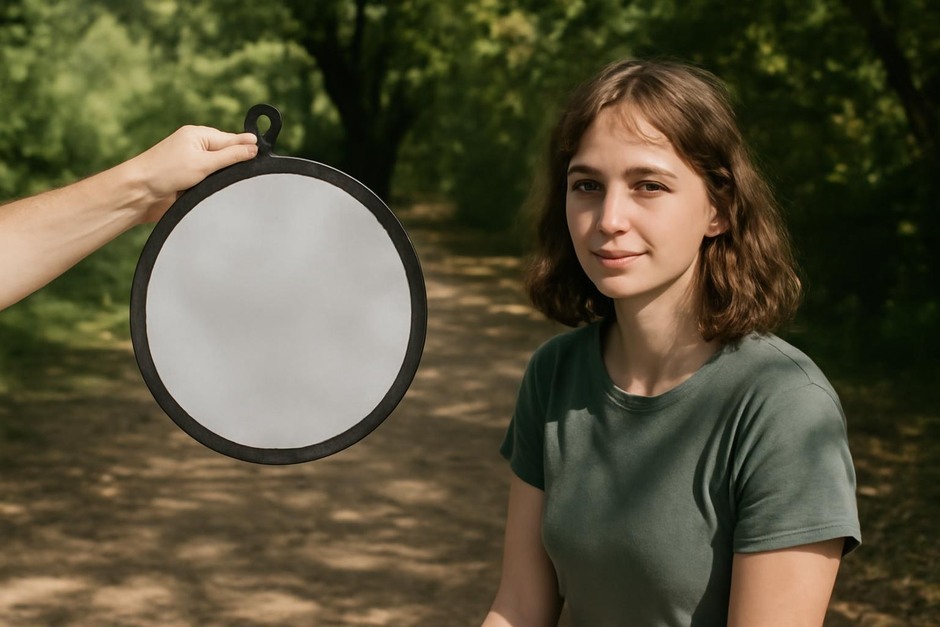
- What it is: A lightweight, folded disc with multiple surface options (white, silver, gold, black often on a reversible panel).
- How to use: Hold or prop the reflector to bounce sunlight into shaded areas; angle it to control contrast. Distance from subject adjusts softness.
- Pros: Very portable, quick to position, gives directional control and can add warmth or coolness depending on surface. No power required.
- Cons: Can be fussy in wind, provides directional rather than fully diffused light (so specular highlights remain), and metallic surfaces increase contrast. Larger reflectors are harder to carry.
- Best for: Portrait fill on walks, adding modeled light to small still lifes, boosting light in shadowed areas without changing overall scene brightness.
Translucent Diffuser (Collapsible or DIY)
- What it is: A translucent panel or fabric that scatters direct light, effectively enlarging the apparent source. DIY versions can be as simple as a square of thin white shower curtain, bedsheet, or baking parchment held between the sun and subject.
- How to use: Place the diffuser a short distance from the subject so the sun shines through it; this softens shadows and evens highlights. Hold or clip the edge to keep it taut.
- Pros: Produces very soft, natural-looking light and reduces specularity. Lightweight and often inexpensive; scaleable—larger pieces give softer results.
- Cons: Requires being between the light source and subject (may block background light), can be unwieldy in wind, and materials can introduce subtle color shifts or wrinkles that affect diffusion quality.
- Best for: Close-up still-life, portraits when you can temporarily block the sun, and any situation where even, wraparound light is desired.
Natural Shade
- What it is: Using trees, building eaves, or overhangs to move the subject out of direct sun into softer ambient light.
- How to use: Reposition the subject a few steps into shade or reframe so the subject faces reflectors of open sky. Notice how the background changes with the move.
- Pros: No gear required, immediate, and often produces very pleasing soft light with natural color. Less wind sensitivity and no color cast from materials.
- Cons: You sacrifice background or ambient sunlit elements and may need to change perspective. Shade can be uneven or dappled depending on canopy and time of day.
- Best for: Quick portraits, texture studies, and when you want to preserve a natural look without extra equipment.
Material Notes and Small Comparisons
- Fabric vs plastic: Fabrics (thin muslin, cotton) wrinkle less in wind and give neutral tones; plastic diffusers are lightweight but can introduce a slight color cast or crinkle texture.
- White vs metallic reflectors: White gives soft fill; silver is contrasty and brighter; gold warms skin tones but can look artificial if overused.
- Size trade-off: Bigger surfaces soften more but add bulk. A 30–40 cm panel is a good compromise for a small bag.
Practice Checklist
- Scan for shade first: Before unrolling anything, see if a slight reposition or a nearby overhang will give the soft light you need.
- Choose the right tool: If you need directional fill, use a reflector. For wraparound light, use a diffuser. If weight is a concern, opt for a small reflector or a piece of white cloth.
- Mind distance: Move the modifier closer to soften light; move it back for a subtler effect. Watch how shadows change on the subject.
- Watch color casts: Test a quick frame—if skin or texture shifts oddly, switch surfaces (white instead of gold) or neutralize in-camera.
- Stabilize in wind: Use your body, a backpack, or a clamp to steady diffusers and reflectors when gusts appear.
- Work fast and small: Favor compact solutions that fit in a day bag; practice unfolding, holding, and angling them so setup is second nature.
All three approaches—reflectors, diffusers, and natural shade—are useful on short outings. The right choice depends on how much control you want, how portable the solution must be, and whether you prefer a natural or shaped look. With a small reflector and a square of translucent fabric you’ll cover most everyday needs while keeping your kit light and your process quick.